Monday, 26 August 2013

Funny Vegetable Nail Art

Funny Vegetable Nail Art Tutorial For Beginners!


I had a tutorial in which I had fun with fruits. So I thought to try out the veggies too. Here is the fun filled nail art using the vegetables. Fun to have and fun while doing also, simple check it out !


Steps For Applying Funny Vegetable Nail Art :-

STEP 1

Apply silver base colour on all your nails. Let this dry completely.


STEP 2 

In this nail art we will draw different vegetable shapes on each nail. So to start with start making the shape of tomato on the nail with red colour. Now make the top with green colour.


STEP 3

Now make the details the eyes mouth eyebrows with black and white as shown which gives this a funny touch. A vegetable with popped out eyes, eyebrows and a smile, it really looks funny.


STEP 4

On next nail make the shape of a brinjal with purple colour. Now make the eyes mouth an eyebrow with black and white colour as shown to give a funny look.


STEP 5

On next nail make the shape of carrot with orange colour. Make top with green colour small strokes with amber colour and finally the fun element--the detailing the popped out eyes, eyebrows mouth with a smile.


STEP 6

On next nail make two potatoes one above the other with brown colour. Now make the eyes, eyebrows and mouth with black colour. For the funny popped out effect of eyes make two dots with black colour on these dots make two dots with white colour and then again small black dots with black colour. And on last nail make the shape of ladyfinger. Now add details on each as shown in the video to add funny look to the nail art.

STEP 7


Finally apply top coat on all the nails for sheen an also preserving the nail art.


VIDEO TUTORIAL:


Watch us on Youtubehttp://www.youtube.com/watch?v=JYNpNef6lAc

For more videoshttp://www.youtube.com/KhoobSuratiStudio/

Wednesday, 21 August 2013

Watermelon Nail Art

Fruit Nail Art Series 1 Tutorial For Beginners!!!!! 
This is the second series of fruit nail art. This series is inspired by the refreshing fruit-watermelon. So check it out...!


STEP 1:
Apply a base coat of pearl sheen colour on all your nails. Let this dry out completely.


STEP 2
Now make a conical shape starting from the top of nail with red colour as shown.


STEP 3
Now take forest green colour and make a French tip (broader than usual) on top of the nail leaving only a "V" shape of red colour. This shows the lowest layer of watermelon.

STEP 4
Demarcate the green and red colour with a fine white line as is visible in the fruit also.

STEP 5
Now take electric green colour and an start making strokes with the brush. This step adds shading for a more natural look.

STEP 6
Now with nail art pen make small black colour seeds on the red "V" part. Apply a top coat to protect the nail art an add sheen to it. And you are ready with water melon slices not on the plate but on your nails.


VIDEO TUTORIAL:


For more videos: http://www.youtube.com/KhoobSuratiStudio

Saturday, 17 August 2013

Papaya Nail Art


Fruit Nail Art Series Tutorial For Beginners!

This series is inspired bythe fruit of angels papaya. So check it out !


Steps For Applying Papaya Nail Art :-


STEP 1
Apply a base coat of electrin green colour on all your nails. Let this dry out completely.


STEP 2
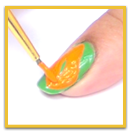
Now start with one nail. Take tangerine Orange yellow colour on a brush and draw the shape of papaya on the nail. Now fill this shape with same colour leaving a small oval shape at the centre.doing it with brush makes it a lot more easier.


STEP 3
Now With take yellow colour and with brush make small strokes all over the papaya for shading.


STEP 4
Make very small cluster of dots with maroon colour so that it represents the seeds of papaya......for a more natural look.


STEP 5
Apply a top coat. This not only gives the sheen to the nail art but also protects it.


STEP 6
Repeat the same process on all the nails and you have a beautiful papaya nail art ready.


VIDEO TUTORIAL:


Follow this link to view this amazing tutorial: http://www.youtube.com/watch?v=UwnPMt7dmOc

Sunday, 4 August 2013

Fanta Nail Art


Ads are a significant part of entertainment, aren’t they? Some of them teach something important, some are too dramatic and some are really funny. Sparking a new trend is another job they do. The style sported by the actors in ads becomes the latest fashion, especially for youngsters. The advertisement of Fastrack sunglasses makes you try that brand when you see John Abraham wearing it!!!  


Similarly dressing styles and several other grooming techniques have been popularized by ads. Certain specific hairstyles of actors in ads cause the viewers to dress up their hair the same way. What if nail art designs get derived from ads? Obviously you’re familiar with the recent ad commercials of Fanta with animations and cute oranges with leaves in the background. 

Now your nail art will reflect the same excellence as that of the ad!! Here comes the new Fanta nail art!!! This is for your nails to show the same funky and attractive glimpses as those in the Fanta ad commercial.

Procedure to apply this art:

Cover alternate nails with base coats of orange color and yellow respectively. Let it dry and then make semi-curves on the nail using dull gold color nail paint. The color combination is specific.

Spread the dull gold colored curvature lines patiently in such a manner that it gives a 3D-effect.

Write the name of the brand i.e. “Fanta” using blue nail paint. Make sure that you write it in the same font as shown in the ad commercial. This will give a more authentic look.

Overwrite the name of the brand and draw the shape of leaf in the same way as it is in the logo, using the same color. Fill the shape of the leaf using green nail paint. 

On the next nail. Make a green semicircle at the top and fill it with orange color. This makes the design look more vibrant. For a more polished look, draw green and gold colored diagonal lines inside the semicircle.

Make three leaf-shapes at the bottom of the semicircle with green color and fill it with the same. Make sure you have the same design on alternate nails.

When the designs are dry, apply a transparent coat to save and protect your design.

VIDEO TUTORIAL


Do all of this and your nails will be ready with the Fanta nail art. Try this and make your nails look adorable like the ad commercial!!! 


Saturday, 3 August 2013

Sunny and Cloudy Day Nail Art


It gives unexplainable joy when the cool breeze of the morning touches your face at the very moment when you’re looking at the rising sun, doesn’t it? Nature has given us enough to relish, and we keep looking for material satisfaction and pleasure of having a lot of money. Did it ever occur to you why morning is the best time for physical exercise and meditation?


The beauty of nature shows up in various forms, be it the rainbow or the lightning in the night, or simply the blissful look of the shining sun. This makes people choose colors and designs similar to that of the sun, moon and clouds. You too sometimes wear t-shirts with such shapes. Your nail grooming now can make you flaunt a style with the beautiful features of nature. 

For the nature-loving and fashion crazy women, here’s the new Sunny and Cloudy Nail Art!!! Now add the charming features of the nature to the look of your nails and make a difference wherever you go!

Procedure to apply this art:

1. Keep the skin areas surrounding your nail covered using a cello tape so that color does not come in touch with the skin.


2. Put some blue nail paint and sky blue nail paint just below it, on a sponge.  


3. Then dab the sponge gently on your nail in such a manner that the colors gets transferred to your nail. Wait for it to dry and then cover it with a transparent shimmer coat to give a gradient look.    


4. With yellow nail paint, draw the shape of a shining sun on the corner of the nail. Make the eyes and mouth using black nail paint. Make white clouds on your nail at randomly spaced spots. Do the same on the other nails. Wait for them to dry.


VIDEO TUTORIAL:


Do all this and the Sunny and Cloudy Nail Art is ready!!! Just a matter of time before you groom you nails with an enticing design depicting the bliss of the nature!!! Sun and clouds on your nails!!! Quite exciting, isn’t it? Go try it and make an impressive style statement!!!